


A Raindrop Sensor is a device designed for rain detection, comprising two key components: a rain board responsible for identifying rain and a control module that translates analog readings into digital values. This sensor can be powered with +5V and features both digital and analog output pins. The digital pin will maintain a high signal when no rain or water is detected on the sensor plate. When even a small amount of water is sensed, the digital pin will transition to a low state and remain there until the water is removed. Additionally, the Raindrop module is equipped with an LED that visually indicates the sensor's output status and a potentiometer is included for adjusting the sensor's sensitivity. The analog pin produces a variable voltage corresponding to the quantity of water on the detection plate.
The sensor applications include various tasks like controlling windshield wipers, automatically closing windows during thunderstorms, or regulating room temperature.
Specifications:
- Working voltage: 5V
- Outputs: Digital (0 and 1) and Analog voltage (AO).
- Sensitivity adjustable via a potentiometer.
- Utilizes a high-voltage LM393 comparator for reliable performance.
- Produces clean waveform signals with strong driving capacity (over 15mA).
- Boasts excellent resistance to oxidation and conductivity, ensuring a long operational life.
Pinout & Parts of Raindrop Sensor Module
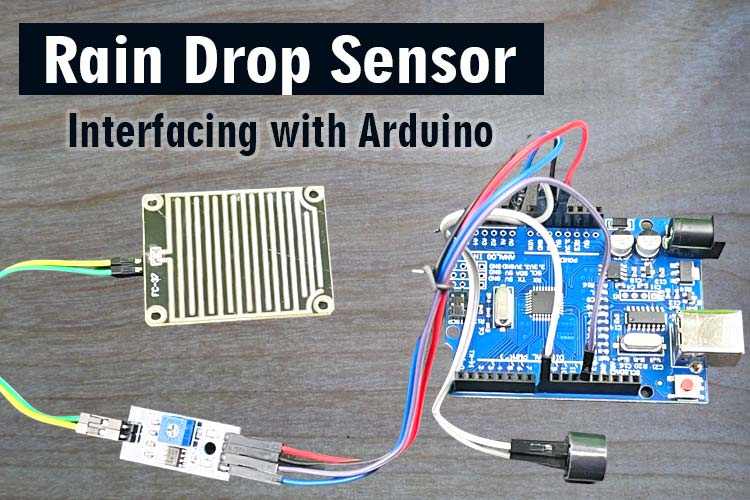
The whole Rain drop sensor consists mainly of two parts: a Rain board and a Control Module.
The Rain Board has nothing other than Two pins as shown in the below image which should be connected to the control module.
The control module has a total of Six pins but four of them are major pins which to be connected to the microcontroller.

The other side two pins are to be connected to the Rain Board whereas, on the other side, four pins are:
- VCC (or +): This pin is used to supply power to the raindrop sensor. It should be connected to the 5V output of your Arduino or an external power supply.
- GND (or -): This pin is the ground connection and should be connected to the GND pin on your Arduino or a common ground reference if using an external power supply.
- AO (Analog Output): This pin provides the analog output voltage that varies depending on the quantity of water detected by the sensor. You should connect this pin to an analog input pin on your Arduino, such as A0, to read the sensor's output.
- D0 (Digital Output): This pin provides a digital output signal that changes between HIGH (1) and LOW (0) based on the sensitivity calibration done by the Potentiometer. Connect this pin to a digital input pin on your Arduino to read the digital rain status.

Power LED: It shows whether the sensor is powered on or off.
Digital Out LED: It indicates the state of the sensor when Rain is detected.
Comparator IC: This is the controller IC that compares the sensing voltage according to the adjusted sensitivity to identify whether the Water is detected or not, the output result of the IC will be HIGH or LOW at the D0 pin.
Sensitivity Pot: The Pot is used to adjust the sensitivity of Water to be sensed by the sensor to make the transition in digital pin.
Components Required:
Arduino Raindrop Sensor Connection Circuit Diagram
The rain board module is connected with the control module as you can see in the below diagram. When the water droplets fall on the Rain board, a small current starts flowing through the board which initiates the comparator IC to trigger the digital output pins based on the sensitivity adjustment. We added a buzzer that indicates beeping when the sensor detects the Rain.

Rain Drop Module connection:
- Connect the sensor’s VCC (or +) pin to the 5V output on the Arduino.
- Connect the sensor’s GND (or -) pin to the GND on the Arduino.
- Connect the AO (Analog Output) pin of the sensor to one of the analog pins on the Arduino, such as A0.
- Connect the DO (Digital Output) pin to any digital pin on the Arduino.
For the buzzer, attach the positive (+) terminal to a digital pin (e.g., 8) on the Arduino, and do not use pin 13 for this purpose as it will trigger a beep when the Arduino is initialized. The negative (-) terminal of the buzzer should be connected to the Arduino's ground.

Arduino Raindrop Sensor Code
The Code Reads the analog and digital pins of the Sensor and displays the output on a serial monitor. The HIGH and LOW output of the digital pin is based on the Sensitivity calibration by using the potentiometer. According to the digital pin trigger transition, the buzzer will act which indicates whether the rain is detected or not.
const int mqPin = A0; // Analog pin for sensor
const int DO_Pin=12;
const int buzzerPin = 8; // Digital pin for buzzer
void setup() {
pinMode(buzzerPin, OUTPUT);
pinMode(DO_Pin, INPUT); // Configure D8 pin as a digital input pin
Serial.begin(9600);
}
void loop() {
int sensorValue = analogRead(mqPin);
int threshold= digitalRead(DO_Pin);
Serial.print("threshold_value: ");
Serial.print(threshold); //prints the threshold_value reached as either LOW or HIGH (above or underneath)
Serial.print(", ");
Serial.print("Sensor Value: ");
Serial.println(sensorValue);
delay(100);
// Adjust the threshold value based on your sensor's characteristics
if (threshold==LOW) {
digitalWrite(buzzerPin, HIGH); // Turn on the buzzer
delay(200); // Buzzer on time
digitalWrite(buzzerPin, LOW); // Turn off the buzzer
}
//delay(1000); // Wait before the next reading
}
Demonstration of Rain drop Sensor Module with Arduino
The Rain board comes with nickel lines that measure water droplets using a comparator IC and provide output. It works on the principle of changes in resistance. When a threshold of comparator voltage is exceeded, the sensor provides a transition in digital output.
Such type of sensitivity can easily be achieved by introducing a sensor board inside water while adjusting the potentiometer. Also, you can easily monitor values on a serial monitor.

Hope you liked and enjoyed the project and learned something valuable from it. If you have any questions, you can leave them in the comment section below.